Color Dissection: How Placement Can Completely Change Your Color
By Keune | November 20th, 2020
One of the most effective ways for a client to communicate their hair goal is by bringing a reference image or two to their appointment. With an example, stylists can establish clear communication about a service to avoid any confusion. Once the goal is agreed upon, it is time for the stylist to dissect the color! Color dissection breaks down the desired look and utilizes the proper color techniques to achieve a finish that is as close to the inspiration image as possible. The goal of color dissection is to efficiently maximize your time behind the chair by simplifying the translation process. Want to learn these techniques? Read on to learn how Keune North America Technical Ambassador, Amber Skrzypek, breaks down color dissection. Then, watch her Keune Academy Live class to see the process in action!
During the consultation
Ask follow up questions about the inspiration images to ensure the desired outcome is not only agreed upon but also attainable. Amber always suggests you ask open-ended questions to engage and open up the client. This type of conversation allows them to expand on their goal and solidify clear communication.
For example:
Instead of asking: “Do you like this color?”
Ask: “What do you like about this color?”
The suggested question guides the client to clear up misconceptions about tone versus placement or overall appeal and, better informs your formulation and technique strategy.
Break down the head shape
Amber demonstrates the impact color placement has on the end result by dissecting the zones of the head. Set yourself up for success and learn how placement in one zone over another significantly changes the look.
Zones:
There are three main horizontal and vertical sections created by separations at the parietal ridge and at the occipital bone. How you place foils in these sections correlates directly to the movement seen throughout the style.
The horizontal sections:
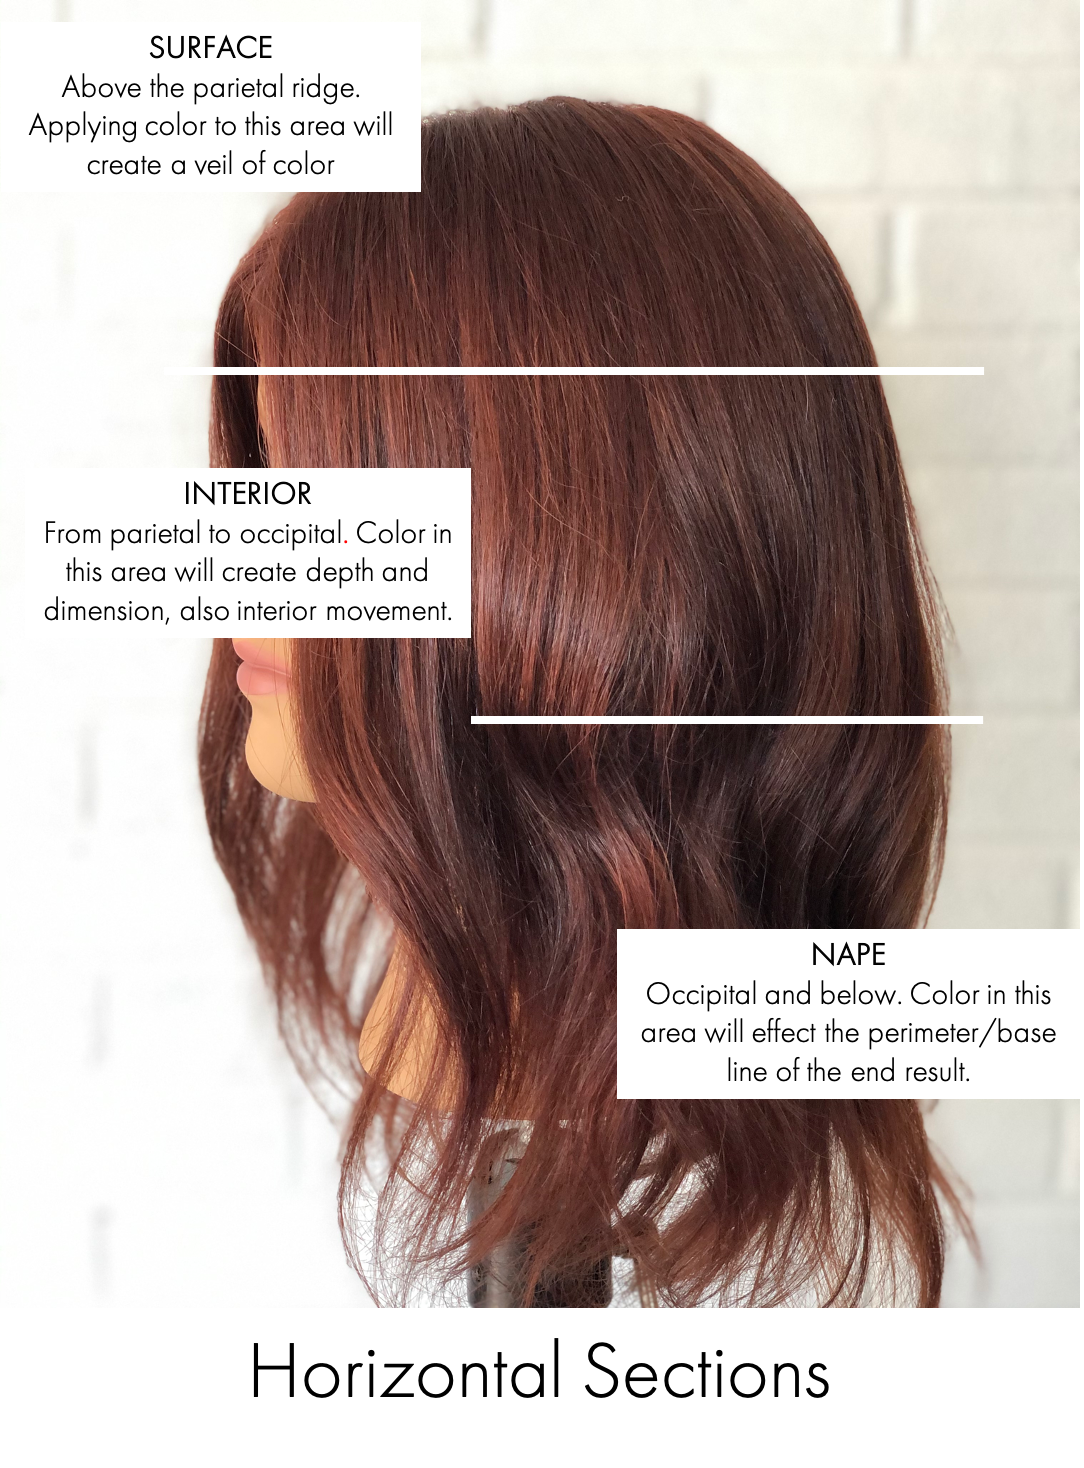
- SURFACE: The topmost section. Foils placed in this area create a veil or pop of color and movement.
- INTERIOR: Where you create depth and dimension. If the goal is to encourage movement, diagonal foils placed here to build both movement and dimension.
- NAPE: Just below the occipital bone, color applied here affects the perimeter of the hair.
*Pro-tip: For thin or fine hair – keep the parameter at the nape darker or add lowlights to give strength and thickness to the finished style.
The vertical sections:
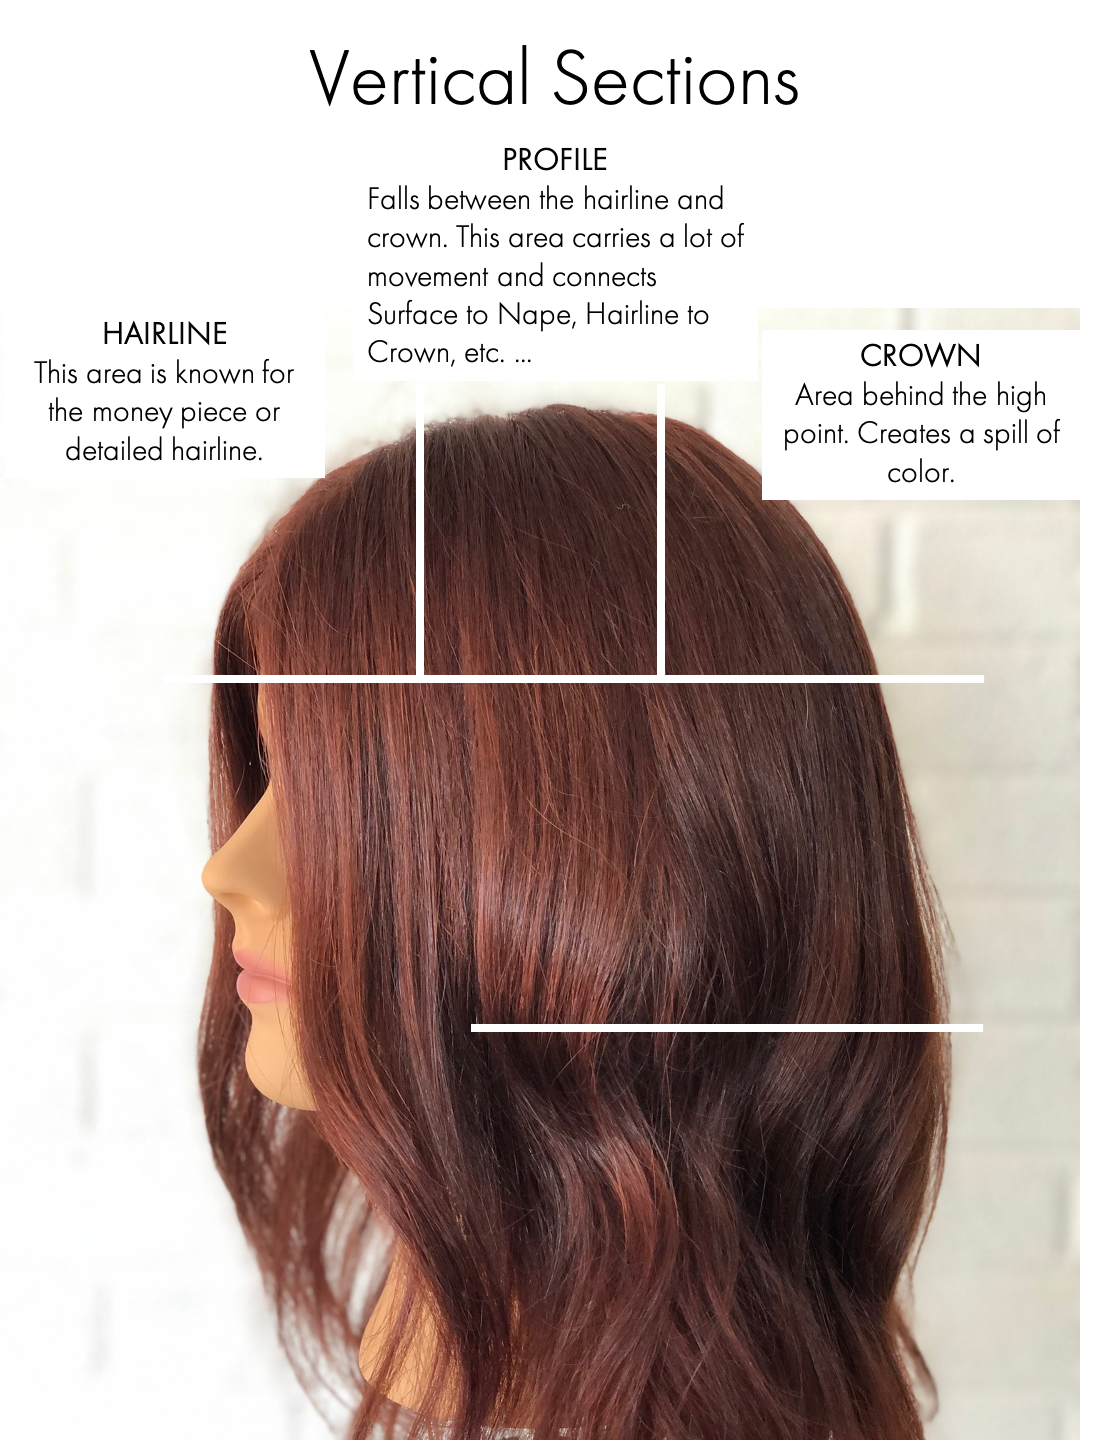
- HAIRLINE: From the highpoint of the head forward. Color placement here achieves the perfect “money piece” (face-frame).
- PROFILE: One of the most important sections of the service area. Responsible for a seamless blend, this section connects the top to the bottom and the front to the back.
- CROWN: Cowlicks present a challenge in this section and cause separation issues within the finished color. Pay special attention to the way the hair falls in this area prior to color application.
Sectioning patterns
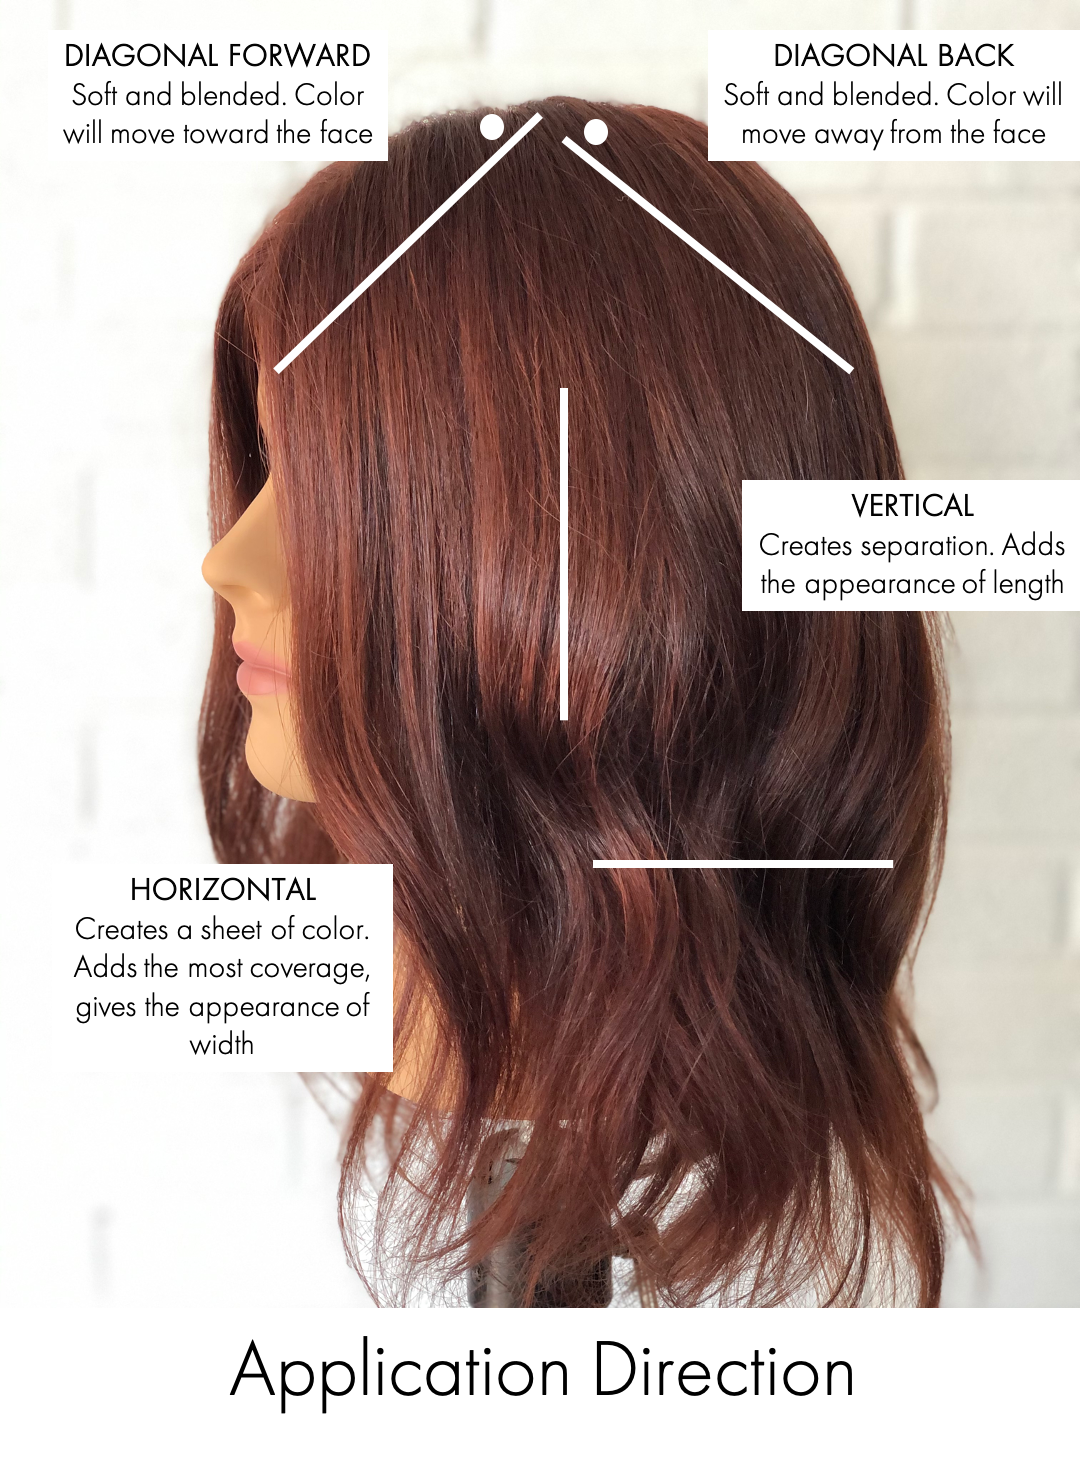
The haircut or style will influence which sectioning pattern to choose. After zones are established, there are four ways to section hair within each zone for balayage and/or foil applications which determine movement.
DIAGONAL FORWARD / – Encourages color to move toward the face. Foils or freehand applications accentuate a forward motion. A diagonal forward placement is also used for softness.
DIAGONAL BACK \ – Moves color away from the face. Ideal for anyone who needs a more open feel.
VERTICAL | – Creates significant dimension. Also creates separation and adds length which gives styles a longer visual result.
HORIZONTAL _ – Offers more surface coverage, but less dimension. Creates width and highest impact on the end result.
Foils or freehand?
FOILS:
Foils are ideal when stylists want a maximum level of lift and stand-out dimension. The way you weave your sections structures various transformations.
For example:
- Babylights: Creates a seamless blend and impactful overall lift with this weaving technique, where there is just as much light as there is dark.
- Medium Stitch: Adds lightness and contrast in dimension, this technique is great for high-density areas between the crown and occipital bone.
- Bigger Weave: Practice this type of weave on coarse, high density, or curly hair to ensure dimension stands out.
Pair with: MAGIC BLONDE
BALAYAGE:
Utilize Balayage if you want a soft, sun-kissed transition with natural effects. The cadence of lift is slightly different with lighter pieces toward the back, darker toward the interior, and lighter again around the face.
Pair with: FREEDOM BLONDE
FOILS & BALAYAGE:
The decision between foils and balayage, or a combination of both, comes down to the inspiration picture and the desired end result. Amber recommends balayage and foils to achieve significant dimension in a single salon visit. Blend the two techniques to build dimension while you accomplish a soft, natural look.
Pair with: FREEDOM BLONDE + POWER BLONDE
Share On


By Keune
Inspiring True Beauty since 1922